Now that you have constructed your GoPiGo3 robot car and can access its desktop from your PC, as explained in my previous article Raspberry Pi, Java, and the GoPiGo3 – Part 1: Setting up the GoPiGo3, you are ready to set up your coding environment. In this blog you will learn how to run the simple proof of concept application to remotely control the robot from within a browser. From there we will be able to start writing your own code using elements from my sample code.
The software goal of this phase of the project is divided into two parts. The first is to create a JavaServer Faces web application to support controlling the car from any browser. The second is to create a family of microservices that will allow controlling the robot car from any language that supports interacting with RESTful web services. This article is about the JavaServer Faces version.
In two previous articles I wrote about how we can write Maven managed Java code on our desktop/laptop computer using NetBeans and then run the code on a Raspberry Pi. The first article, How to Run Maven Based Projects on a Remote Raspberry Pi Using NetBeans Part 1 of 2 , explained how to do this by using a file transfer program/remote terminal, such as WinSCP, to place the executable jar file on the Pi. The second article, How to Run Maven Based Projects on a Remote Raspberry Pi Using NetBeans Part 2 of 2, explained how to transfer the executable jar file and then execute it from within Maven. It is this second approach that we will use in this proof of concept, so you may want to review this article before proceeding.
The Supplied Sample Code
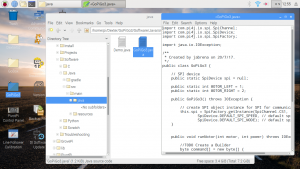
The Dexter version of Raspbian for Robots OS that you should have running on your Raspberry Pi comes with sample code in a few different languages. The most extensive is in Python and the least extensive is in Java. One of the reasons that Dexter Industries was kind enough to provide me with two GoPiGo3 robot cars is to produce a more extensive Java offering. For this proof of concept, the one sample Java program included in the OS will be sufficient. You can find this one lonely sample in /home/pi/Dexter/GoPiGo3/Software/Java/src/main/java.
Raspberry Pi Preparation
In part 1 of this series I showed what my setup for working with the Pi. Now let’s look at what we need to develop on the Pi. This is not the first time I have developed for the Pi from my desktop computer. You may want to read my blogs on my first Pi experiments.
- IOT Without the Breadboard Part 1
- IOT Without the Breadboard Part 2
- IOT Without the Breadboard Part 3
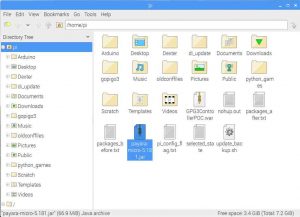
The Raspbian for Robots OS comes with Java 1.8. There is no need to upgrade to a newer version of Java. What you will have to add to your Pi is the Payara Micro Server 181 or higher. You will find it at https://www.payara.fish/downloads. To simplify things for myself, I downloaded it with the browser on the Pi. You could download it on your PC and use a program such as WinSCP, Putty, or Filezilla to transfer it to the Pi. The Java concept of write once, run anywhere is evident in the fact that there is just one version of Payara Micro regardless of the platform such as x86 or the Pi’s ARM. Place the server file, named payara-micro-5.181.jar as of this writing, into your home directory on the Pi. As I use the default user named pi, my home directory is /home/pi. Here is my home directory after downloading Payara Micro.
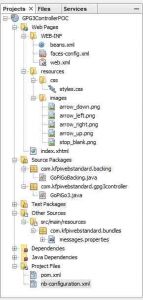
You are now ready to retrieve and run the proof of concept code. On your PC use git to retrieve https://gitlab.com/omniprof/GPG3ControllerPOC.git. You can do this from the command line or within your IDE. I use NetBeans and it works very well with git, so I rarely work at the command line. If you are using NetBeans then this is what you should see in your Project window:
The Files
beans.xml
This file is required for Context Dependency Injection (CDI). It may be an empty file or, as in my sample code, it just contains the root element. Forgetting this file or adding anything other than the root element will result in CDI failing.
faces-config.xml
The presence of this file informs the server that this is a JavaServer Faces (JSF) application. In this project it is also the place where we reference the resource bundles for i18n. Living in Canada where there are two official languages every developer in Canada is well versed in i18n. This is also where JSF navigation rules, if used, are placed.
web.xml
This file was once the heart of web applications but with annotations and frameworks it has become less important and, in some cases, can even be left out. In this project it configures the JSF FacesServlet, sets the session timeout, and establishes the default web page, index.xhtml.
styles.css
This CSS file contains only one class for configuring the title of the project.
*.png
These are the five images that will make up the control panel of the application. In a previous blog I wrote about how to use the Font Awesome library of icons and fonts in a JSF application. I chose not to do that here because the library is quite large while five small jpeg files take far less space in the war file.
index.xhtml
This is the JSF page. It presents 5 buttons that when pressed sends messages that control the GoPiGo3 motors. Ajax is used to speed up communication between the browser and the server.
GoPiGoBacking.java
This is the backing bean for index.xhtml. It instantiates the GoPiGo3 class. The five action methods for each of the five buttons on the page are in this file.
GoPiGo3.java
This is the original Java file that came with Raspbian for Robots OS. It works with the Pi4J library to communicate with the motor connections and the other connectors on the board. As new features, such as an ultrasonic sensor, are written then this class with grow.
messages.properties
This is the i18n resource bundle file referenced in the faces-config.xml file. The name without a suffix will work for any language. If you want to support other languages, then you need to use the proper suffix. For example, to use Canadian French words because the browser declares that it is in French Canada you would name the file messages_fr_CA.properties. You are responsible for the translations.
pom.xml
This is the Maven build file. Here is where we declare a dependency for the Pi4J library so that it is downloaded and added to the war file. It is also here that I have declared that the program winscp.com will execute after a successful build of the program. The file is well commented so I suggest reading it to understand how it does what it does.
webtopi.txt
This file is in the root of the project, the same location as the pom.xml. NetBeans does not show this file in the Projects view but it is revealed in the Files view. This is the script that winscp.com executes.
[pastacode lang=”markup” manual=”open%20%22scp%3A%2F%2Fpi%3Araspberry%40192.168.140%22%20-hostkey%3D%22*%22%20-timeout%3D120%0Aput%20target%5CGPG3ControllerPOC.war%0Acall%20java%20-jar%20payara-micro-5.181.jar%20–deploy%20GPG3ControllerPOC.war%0Aexit%0A%0A” message=”webtopi.txt” highlight=”” provider=”manual”/]
The first line connects and logs into the Pi. The second line copies the war file from the project to your home directory on the Pi. The third line executes Payara Micro, deploying the war file.
How to make this all work
If you can successfully bring up the desktop on the Pi using Remote Desktop or VNC then you are ready to run the program. You will need to make changes to the webtopi.txt script by entering your user name and password along with whatever port your GoPiGo3’s Raspberry Pi is using. I have configured my wireless router to always use a static same IP number for my Pi so that I don’t have to look for it every time I want to work on the project.
Do a Clean and Build in NetBeans. Assuming there are no errors you should see output from the Pi in the console window of NetBeans. Initially you should see:
[pastacode lang=”markup” manual=”Authenticating…%0AWARNING!%20Giving%20up%20security%20and%20accepting%20any%20host%20key%20as%20configured!%0AUsing%20username%20%22pi%22.%0AAuthenticating%20with%20pre-entered%20password.%0AAuthenticated.%0AStarting%20the%20session…%0ASession%20started.%0AActive%20session%3A%20%5B1%5D%20pi%40192.168.140%0Atarget%5CGPG3ControllerPOC.war%20%7C%C2%A0%C2%A0%C2%A0%C2%A0%C2%A0%C2%A0%C2%A0%C2%A0%20516%20KB%20%7C%201717.8%20KB%2Fs%20%7C%20binary%20%7C%20100%25%0A%0A%0A%0A” message=”Connecting to a Pi” highlight=”” provider=”manual”/]
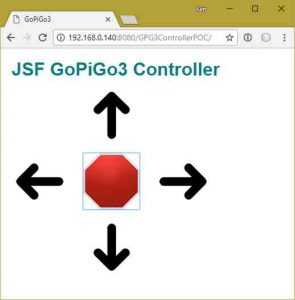
This confirms that you have connected, logged in and transferred the file. It may take as long as a minute before Payara Micro is running and your application is deployed. Now open a browser on any computer connected to the same router and enter the Pi’s IP number, port 8080, and the name of the application. On my computer it looks like:
http://192.168.0.140:8080/GPG3ControllerPOC
If all is well, you should see the user interface.
Exiting the program – two step process
You can end the connection from NetBeans to the Pi by ending the build. There is a small button on the bottom of the main window near the right side. This will end the WinSCP program.
WinSCP will exit on its own if there is no communication between the Pi and itself. The –timeout attribute of the open command says to wait 120 seconds. If no message is sent or received within the timeout period, then you are given a warning and shortly after WinSCP ends the connection. This creates an exception in the Maven exec plugin and a stack trace appears. You can ignore the stack trace.
Your deployed application and Payara Micro are still running in both cases above. If you attempt to Clean and Build again you will get an error on the open command in the wintopi.txt script because an instance of Payara Micro is already running and listening to port 8080. Unfortunately, I have not found a way to end or kill the Payara Micro process on the Pi from WinSCP or NetBeans. If you know of a way then please let me know.
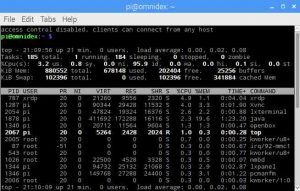
Go to your Raspberry Pi remote desktop connection on your PC and open a terminal window. In the terminal enter the command top.
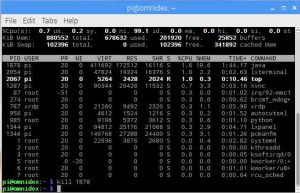
The top command shows you processes running on the Pi, a little like Windows Task Manager but without any user friendliness. In the table in the screenshot above, you will see that the fourth line is the result of the java COMMAND. Take note of the PID that is 1878 in this example.
Close the top program by pressing Ctrl-C. At the command prompt enter kill 1878 and the java process will end and you can now deploy a new version to the Pi.
Conclusion
This JavaServer Faces proof of concept project has worked nominally (first time I ever used ‘nominally’ in a sentence). I wanted to recreate the functionality that the Python application provided. Now I will move on to the RESTful web services proof of concept.

