
Code One, previously named Java One, is one of the largest conferences for software developers. While it was primarily focused on Java programming, this year it was opened to other languages. The reason for this change became apparent during one of the keynote presentations. Oracle like Microsoft, IBM, and Amazon consider cloud services a large part of what they offer to their clients. The cloud is not restricted to Java and so this year neither was the conference.
The first three years that I attended I participated on panels. This meant that I got to speak for 5 minutes, showed three slides and qualified for free admission to the conference that normally costs around $1500. In year four I submitted two proposals, both related to teaching and NetBeans, that were accepted. This year I submitted four proposals of which three were accepted.
A few years ago I was advised by Geertjan Wielenga, a product manager for NetBeans and now Oracle Jet, who had invited me to the panels and now a good friend, that there were two approaches to getting a session accepted. The first is to have your session held on the Birds of a Feather or BOF track. These sessions are held in the evening. They are also known as notoriously poorly attended so far fewer potential speakers submit to this track. The second piece of advice that Geertjan gave me is to have a catchy title.
With this advice in mind I submitted the following:
BOF Track:
- Don’t Answer the Phone During Your Screen Cast!
- Got a Gig Teaching Java? You Should Be Using Apache NetBeans in the Classroom
- Let’s Be Honest, There Are More Java Villains Than Java Champions
DEV Track (during the day)
- Running our Robot Overlords with Jakarta EE
The session on screen casting was not accepted but the other three were.
My career that started some 40 years ago in industry was one in which potential clients would ask me if I could perform a specific coding task. I would pause to consider the request and then assure the potential clients that I could. I once worked for three years coding PL/1 on the IBM PC despite the fact that I knew nothing about that language when I accepted the gig. You have to pay the bills and I had a young family. It did work out, at least until the client’s parent company went bankrupt.
As a teacher, and along with my fellow instructors, I have found myself needing to learn new technologies. The decision to take on something new is necessary to provide our students with the knowledge and skills to find employment upon graduation. If there is one constant in software development, it is that there is no constant. This is what I have enjoyed most about this field.
Got a Gig Teaching Java? You Should Be Using Apache NetBeans in the Classroom
The same holds true for some of my submissions to Code One. Talking about NetBeans in education was the easy one. I use it in all my courses and for the use case of training Java developers I feel strongly that it is the best IDE. My other two accepted sessions could best be described as Conference Driven Development.
Let’s Be Honest, There Are More Java Villains Than Java Champions
In the Java Community there is a designation called Java Champions. A Java Champion is someone who has demonstrated leadership, innovation in Java development and the writing of highly regarded books or open source software. They are a driving force in the Java community. I was 0/3.
That’s how I came up with For Let’s Be Honest, There Are More Java Villains Than Java Champions. Not everyone is a programming god. Not every piece of code is written to best practices using the ideal design pattern. So, I decided to do a humorous presentation on some of the bad practices that developers employ to get the job done. It was to be an homage to the journeyman developer. The truth is I saw it as a standup routine with PowerPoint slides. This was something I have never done. I can get the odd smile from my students and even a laugh or two, but 45 minutes of standup was going to be outside of my comfort zone.
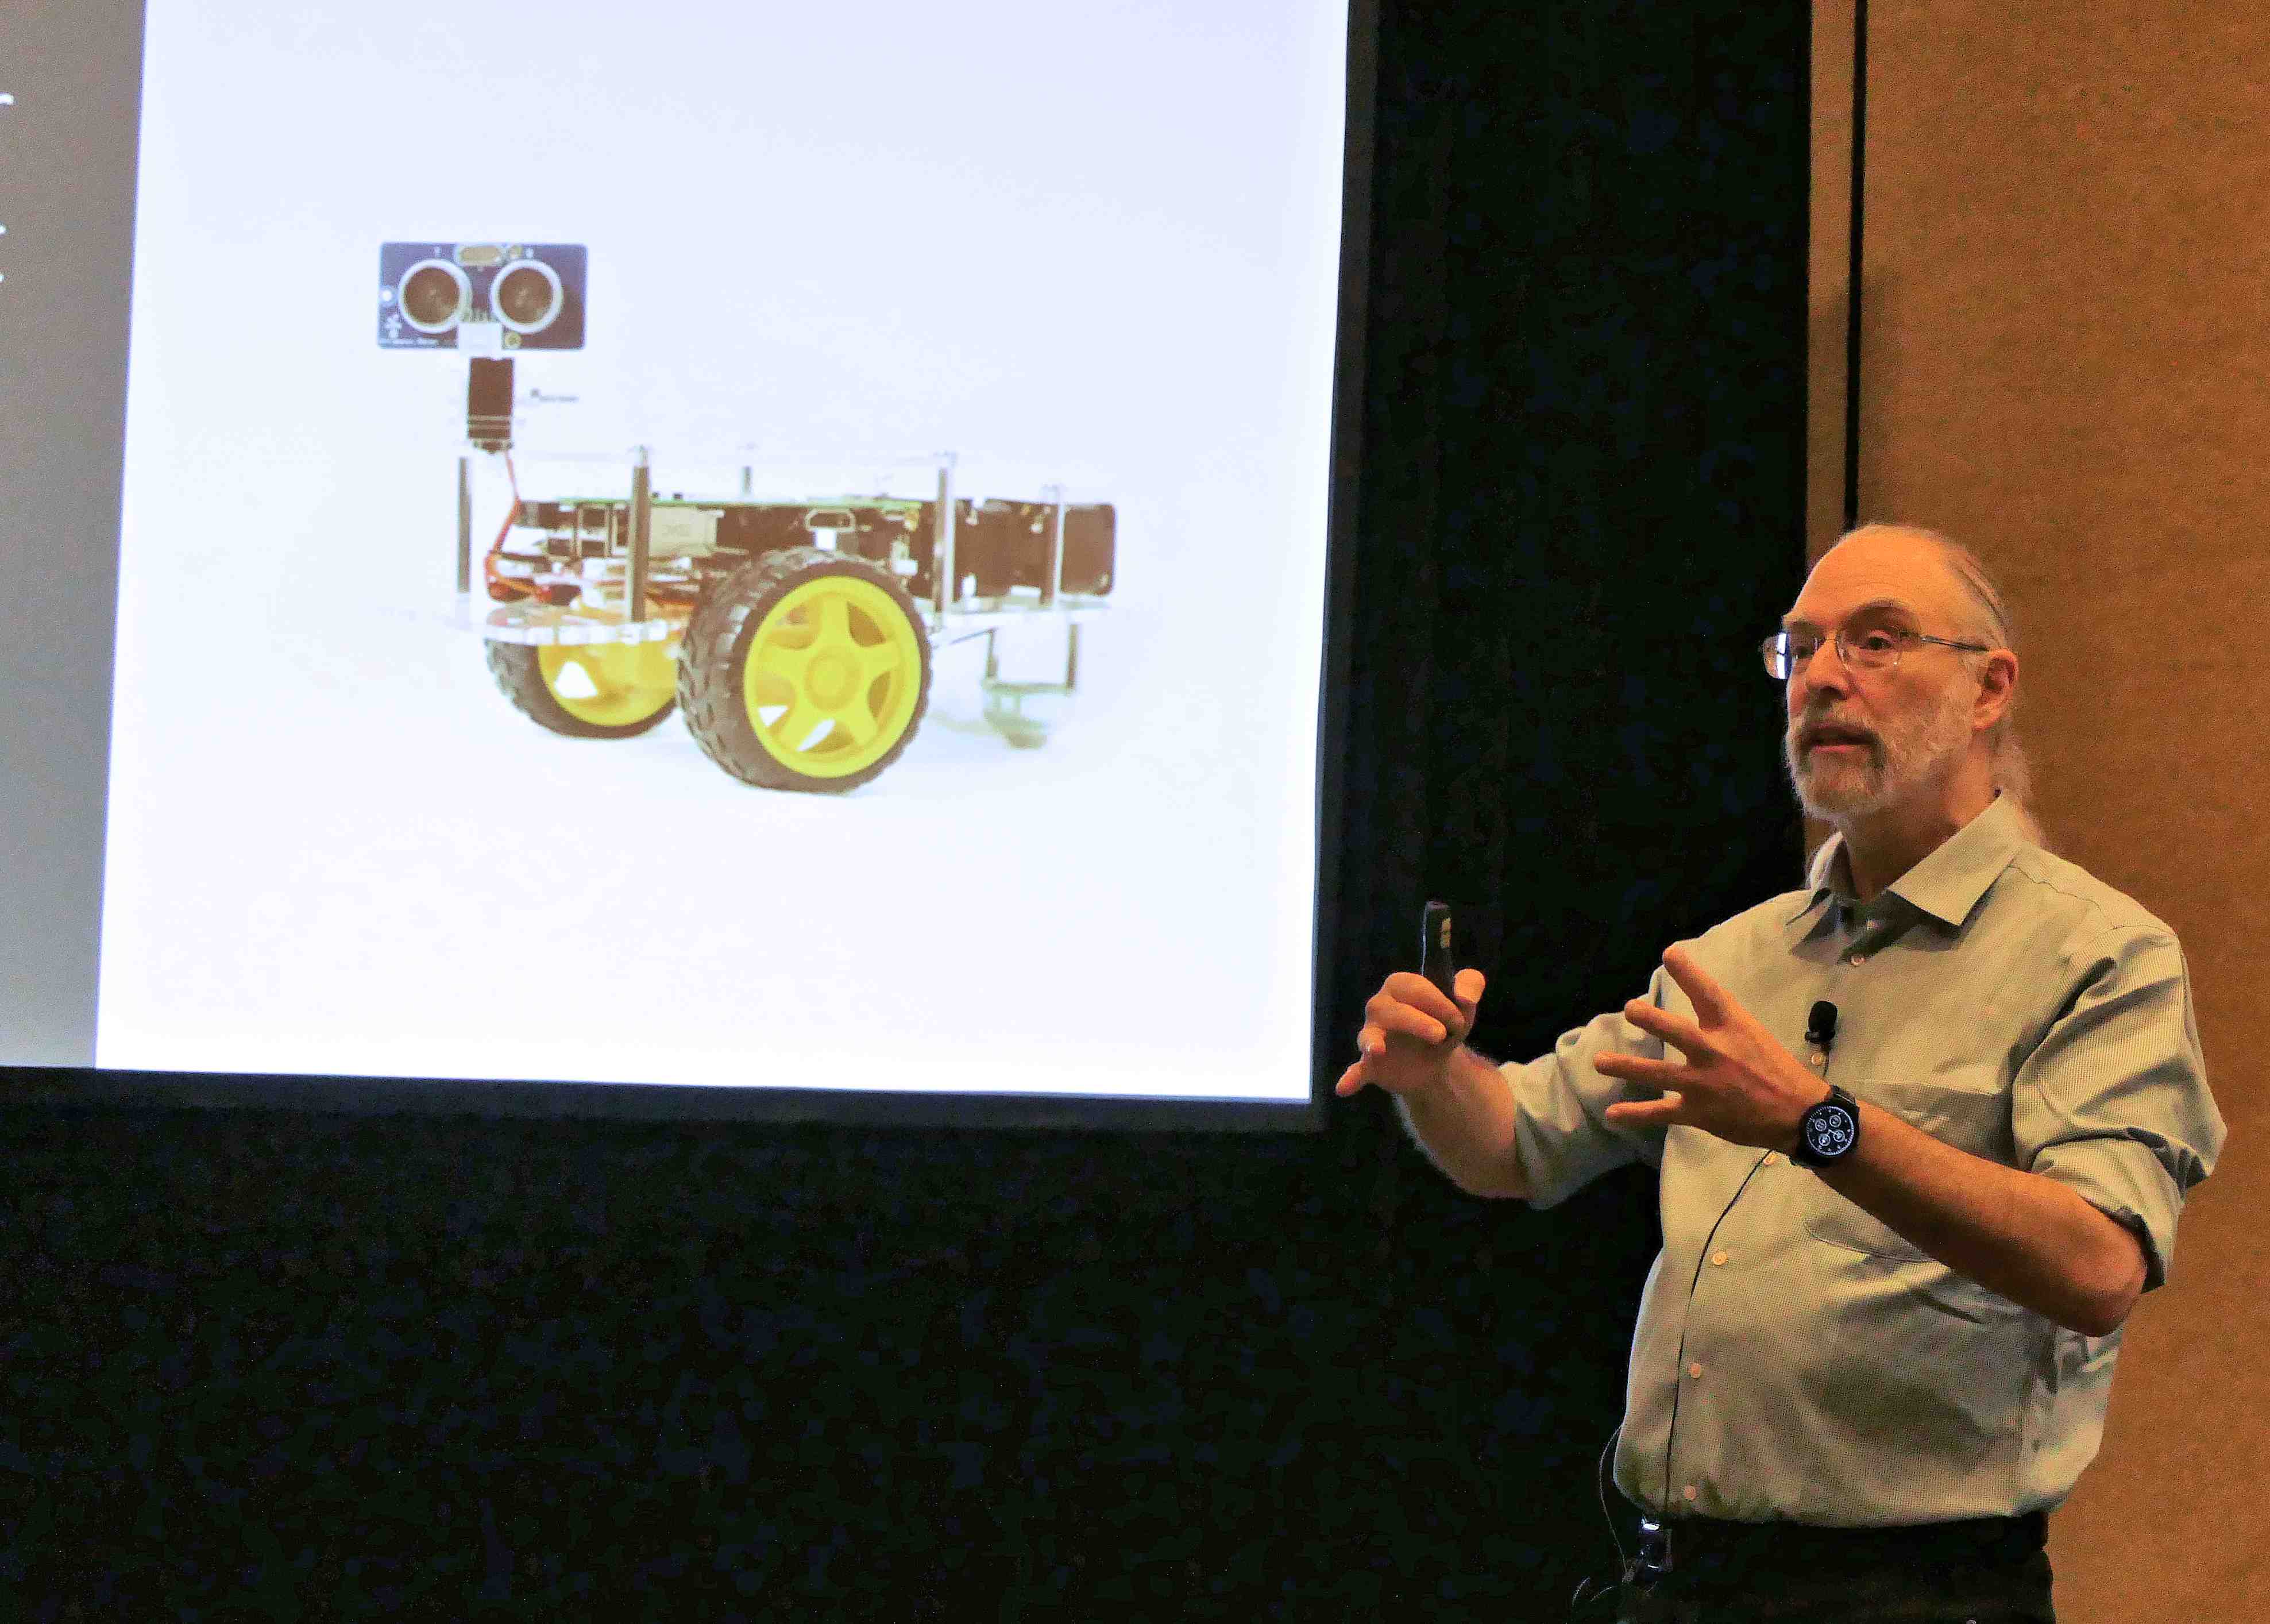
Running our Robot Overlords with Jakarta EE
Two years ago, I encountered a company called Dexter Industries. They sold educational hardware for the Raspberry Pi computer. One of their products is the GoPiGo3 robot car. They had software in Python, C and some other languages but they did not have a formal offering in Java. I offered to work to produce the necessary Java programs to support the car working with my students in an extracurricular activity in return for getting some cars for free. The software was going to be open source. To my surprise I could not interest my students in programming this ‘toy’ and so the two free robots Dexter sent me gathered dust on a shelf.
That is how I came up with Running our Robot Overlords with Jakarta EE. The existing software in the other languages was meant to be used in applications that would run on the car’s Raspberry Pi. I thought it would be more interesting to create a hosting platform in Java Enterprise and then control the car remotely either from JSF web pages, RESTful services, websockets and possibly even microservices. Truly an example of Conference Driven Development. I won’t go into the details suffice to say that I expanded my knowledge of Enterprise Java, now called Jakarta EE, way beyond what I expected when I wrote the proposal. It turned into a presentation more on EE than robotics. After probably more than 100 hours I developed the necessary code to do most of what I set out to, all for a 45-minute presentation. I was still working on software issues for the presentation on the flight to San Francisco and even worked a few more hours on it in my hotel.
When the conference began I was ready. I had what I thought were three excellent sets of PowerPoint slides. I tested the robot and it worked flawlessly. After a session I attended that presented some other robots in the poorly lit conference rooms I went to Target and bought a small desk lamp so I could have a spotlight on my car. I was prepared for every eventually except one.
Monday Evening BOF
My first session was the Let’s Be Honest, There Are More Java Villains Than Java Champions BOF on Monday evening. I had 47 attendees come to hear me, a number that I was told was remarkable for a BOF. Unfortunately, all the rooms in the Moscone Center, where the conference is held, holds 300 seats. Still, I knew it was a good turnout.

I nailed it. I didn’t stand on the podium but walked around the room. I was given a wireless microphone, but I never turned it on. I have a loud voice and without a full room there was no need for amplification. I opened with a Dudley Do-Right cartoon from the 60s that the attendees, all born long after the cartoon was made, found funny. This warmed up the crowd as I intended. With my remote in hand I went thru the 18 slides and those who attended laughed. They laughed at the right places and clearly were having a good time. I finally understand why some people become standup comedians. The thrill of an engaged audience is better than any drug. Don’t get me wrong, I won’t be quitting my day job to perform at comedy clubs. This humor requires an audience of software developers. Still, given the opportunity I’d love to do it again. I left the Moscone center that night with a serious case of swollen ego and head.
Tuesday Evening BOF
Tuesday evening was my Got a Gig Teaching Java? You Should Be Using Apache NetBeans in the Classroom BOF session. This is when I discovered the one contingency I could not have a plan B for. No one showed up, zero, zip, devoid of humans. I knew that this is always a possibility for the BOF track and while I took it in stride it did deflate my mood from the previous night. On Thursday evening after the conference ended I was at a house party held by some people I became friends with from previous conferences known as the UsualSuspects. As I walked around the house I came across a few people talking when one of then told the story of the session no one attended, and that the speaker actually tweeted about it. One of the people knew me and he exclaimed “Oh, you’re talking about Ken”. I guess I’m infamous for something.
Wednesday Morning DEV

Wednesday morning was my Running our Robot Overlords with Jakarta EE DEV session. Daytime sessions are the big time. The session went off without a hitch. I even had to shorten it significantly when, after explaining my project and going thru the first experiment/demo, I noticed I had only 10 minutes left and four more demos. I had a plan B and one of my experiments showed a range of Java acronym frameworks that I was confident would be new and a novel for those attending. It was a success even though I had prepared a two-hour presentation and not a 45 minute one. When I briefly spoke with some of the attendees after the session they expressed how much they enjoyed the session and that I had inspired them. The only downer was that only nine attendees came, sigh. I guess someone must give sessions that, despite the hopes of the committees that select sessions, fails to attract attendance. I just wish it wasn’t two of my sessions.
I have said, semi-seriously, to people I know at the conference that when I am in the classroom I am most likely the smartest person in the room. At Java One/Code One I’m likely the dumbest person in the room. This year I wanted to prove this wrong. I speak in front of students almost every day and I will never be accused of being shy. Yet, I was truly nervous this year. Here I was trying my hand at standup and presenting technical EE. Was I going to make a fool of myself?
I am confident all three presentations were up to the standards required of by Code One. Still, there is some disappointment that my sessions did not inspire more (or any) attendees to come and see what I had to say.
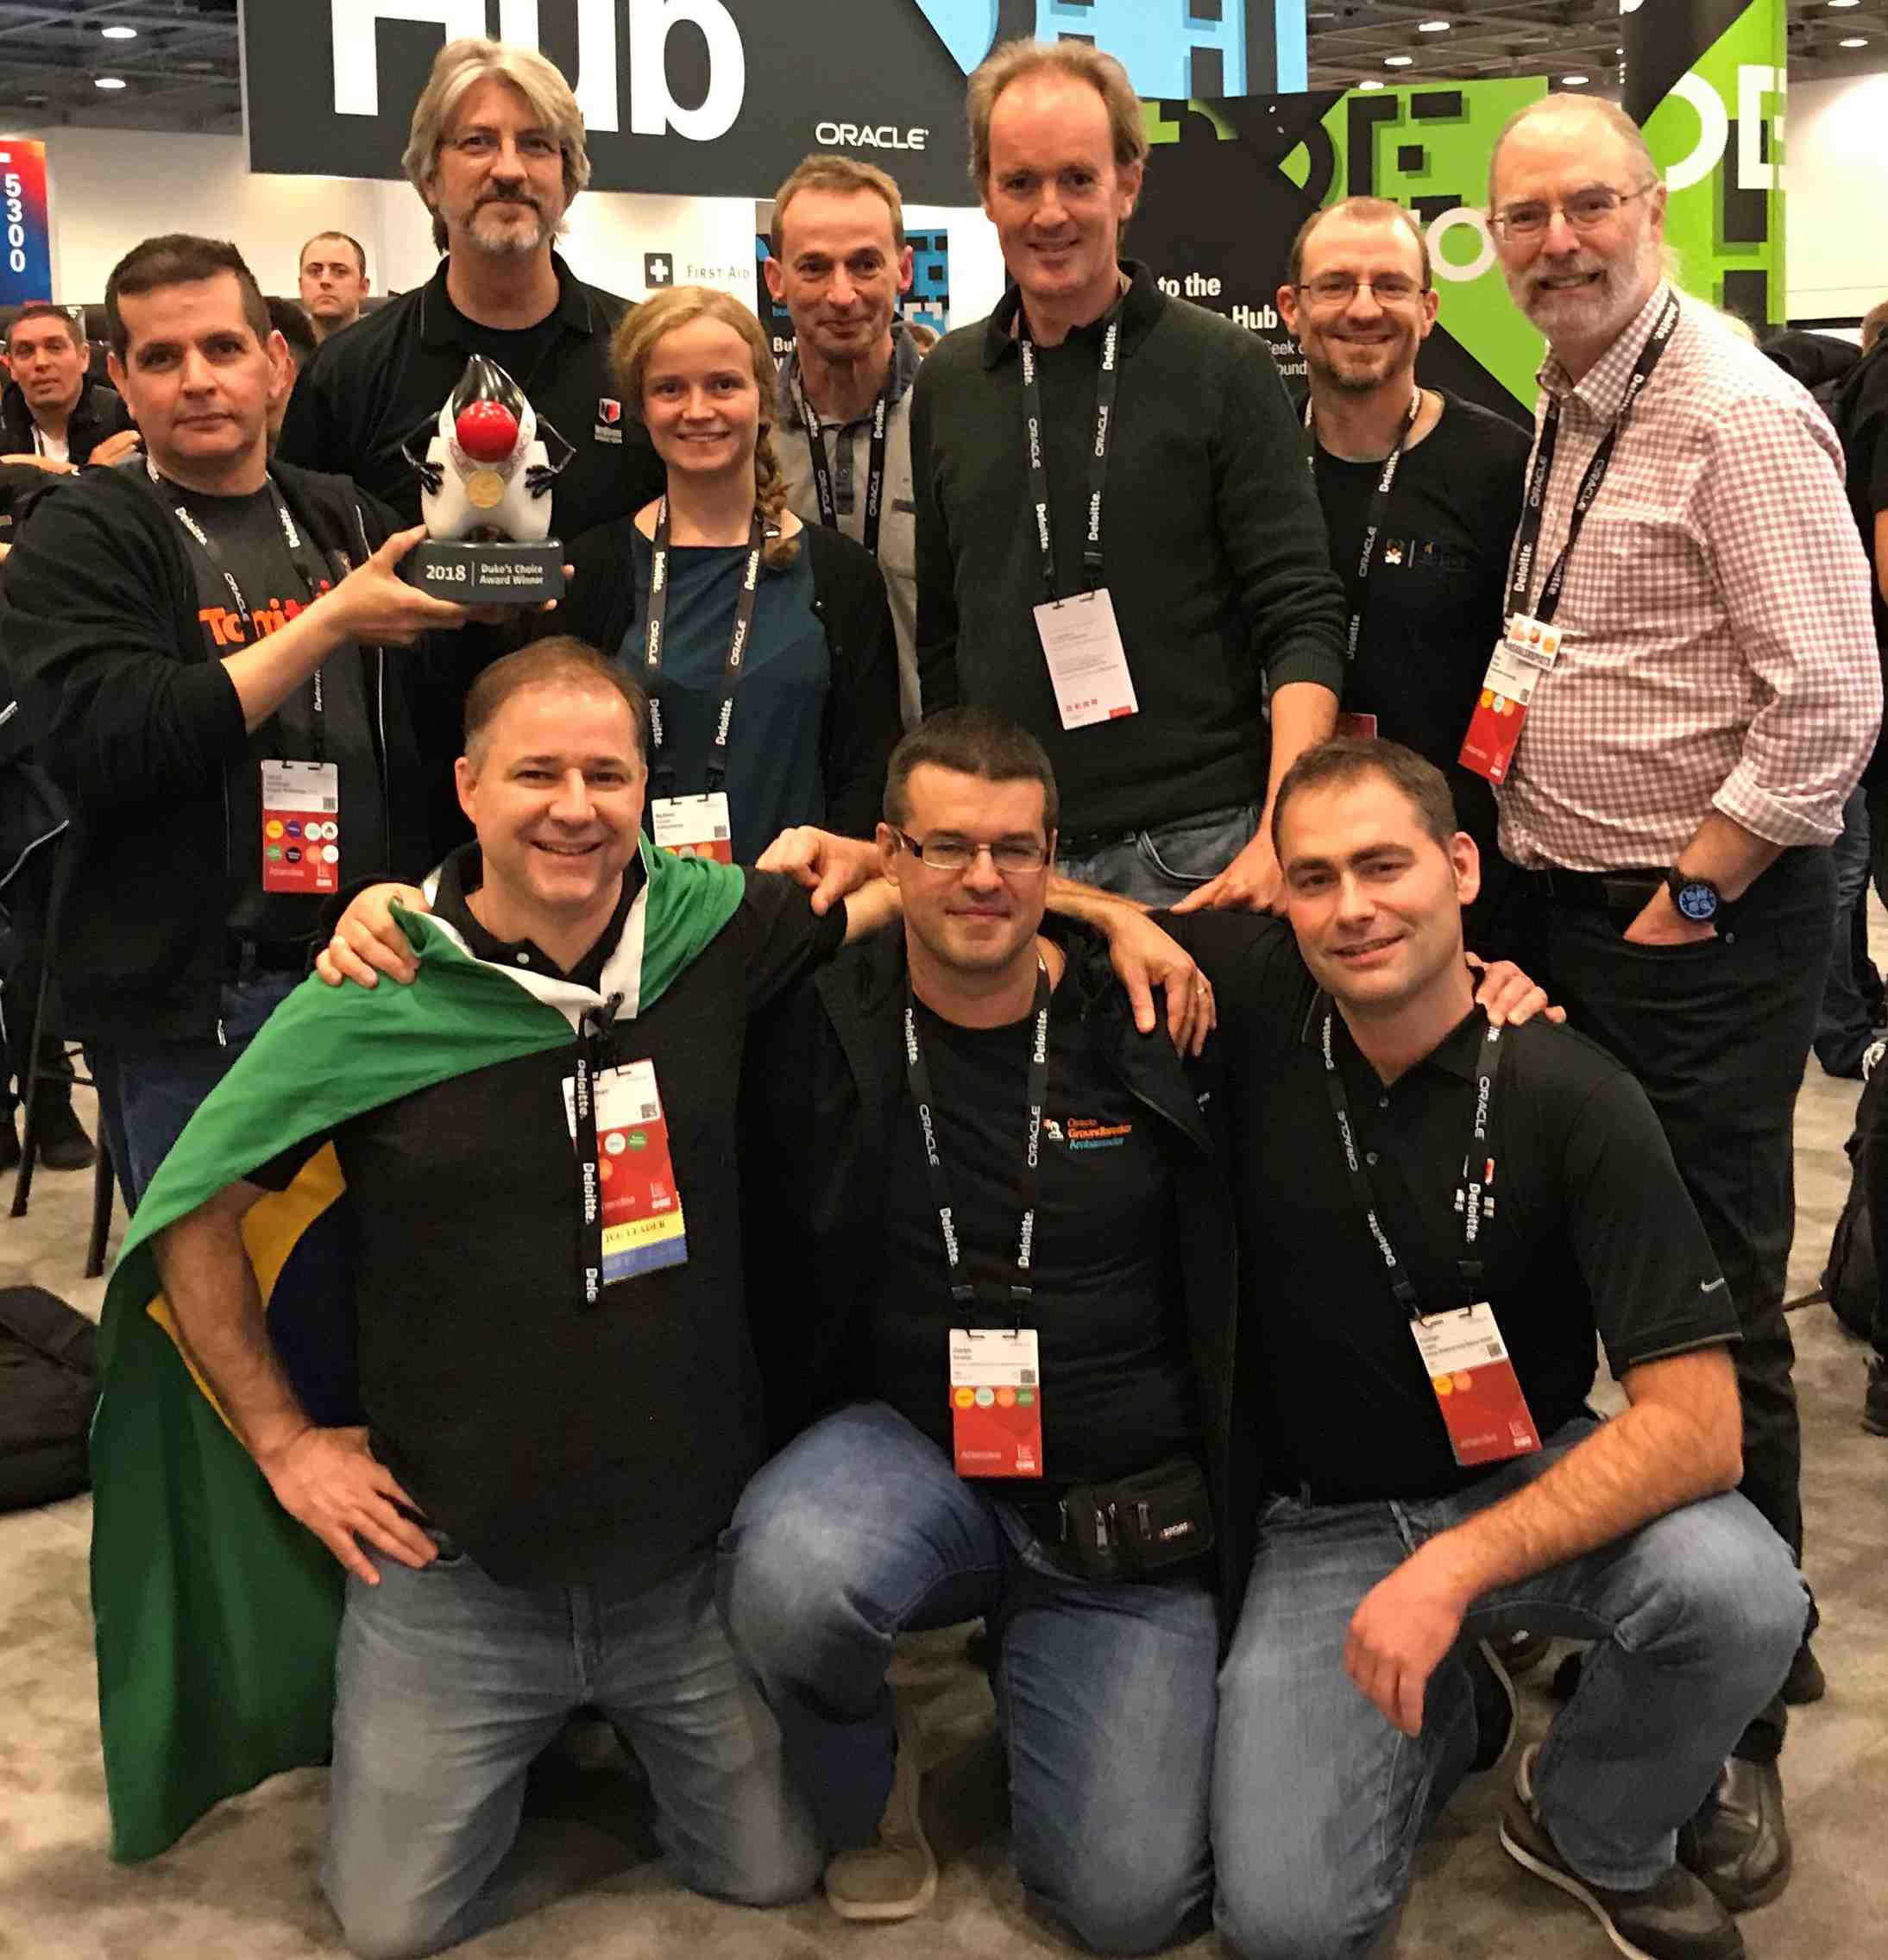
Duke’s Choice Award for Innovation Awarded to Apache NetBeans
Not everything was a bummer. I attended some excellent sessions. I am a proponent of NetBeans and a member, in a very small way, of the community working on it as it becomes an Apache rather than Oracle project. At Code One they hand out an award called the Duke’s Choice for Innovation and this year’s was handed out to the Apache NetBeans project. There were about 10 of us NetBeans folks who came forward at the presentation amongst the many NetBeans family members at Code One and as a group we accepted the award. We also all got to have a professional portrait taken, one at a time, as we held the trophy. I posted that photo of me on Twitter and within 48 hours it had 19,000 impressions. Ego almost completely restored.
There is still another report to write. I receive funding to attend from Dawson College and Concordia University to help cover some but not all of my expenses. They require a report that details what I learned and how it will make me a better teacher.
So that’s my story. I know I’m a better programmer and a better teacher for attending Code One. I have networked with some amazing developers from around the world and had the chance to promote the conference DawsCon that I organize at Dawson College in January. Still, I wish I could have inspired more people at Code One.
Ken Fogel